Simplicity is Beauty. Origami is the Japanese papercraft of folding delicate pieces of colored paper to create various objects simply by folding it. This tutorial is how to fold a crane box, as seen in my last post. OK, so after looking at all these steps, you may say "hey! I don't know about you, but some of those steps don't look so simple" and you would be right. But it's made out of one piece of paper! Entertainment that ends with a fancy box doesn't get any simpler than that.
Tips before we get started:
- Use origami that's at least 15cm/side or your box will be itty bitty and hard to fold.
- Running a ruler over the folds make them extra crisp, evenly. (Fingernails can end in tears)
- Removing nail polish beforehand can prevent getting random streaks of color on your creations.
How To: Make an Origami Crane Box
1) Fold into a triangle & unfold.
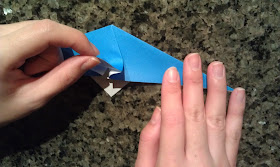
2) Take the bottom corner of the paper and fold it up to the crease that you just made as seen below. Do the same thing with the top corner.
3) Flip & fold in the middle so that it is now half the length.
4) Flip
5) Take one of the inner corners, pull upward and fold down. Do this for both corners.
move it upward
pull & fold
this is what it should look like
6) Open by taking the top corner on the left side, and moving it over to the right.
7) Fold in half, lengthwise.
8) Holding both sides to keep it laying flat, there will be a flap in the middle.
Insert one finger into this and fold down. Do this on both sides.
9) Lift the bottom corner to the top, and fold.
This is a bit tricky and can lead to tears if you're not careful.
take the bottom corner
pull up
fold down
step complete
10) Take the right corner and pull up, folding it inward. Do this on both sides.
fold up and in
step complete
11) Take the top corner on the right and fold over to the left. Flip. Repeat.
12) Turn 90 degrees to the right.
13) Open by taking the top corner on the right and folding left. Flip. Repeat.
Open
Step Complete
14) Take the bottom corner, fold up so the kite shapes show.
Flip. Repeat. (This is similar to step 11)
15) Fold the kite in half.
16) Take just the top layer of the bottom corner.
Fold up to the middle as seen below. Repeat with top corner.
Complete on both sides, each time folding the kite out of the way before folding to the half way point.
This should end with the kite shape being on top of the newly folded pieces.
Fold up to the half way point with the kite folded over.
working on the second side (flipped 90 degrees to the left)
step complete
17) Flip the right side over to the left. Flip. Repeat.
(Similar to steps 11 and 14.)
It should end up looking like this.
18) Fold the bottom corner up. Flip. Repeat.
19) Flip the right side over on both sides. (Similar to steps 11, 14, 17)
Note: Be careful to fold the triangles you just folded in step 18 in half nicely.
20) Let go to open slightly. Choose one of the halved triangles from step 19 and fold a little bit of the point down. I typically go for about 7mm. This will create the head of the crane so make it as big or as little as you'd like. The best way to make the head is to fold it all the way down, squish it as it looked after step 19, and then pull it out to the desired angle.
21) Insert one finger in the middle to open up the box.
22) Take the top layer of the kite-shape on either side and peel down. These are the wings.
Use a ruler to curl slightly (the same way you would curl a ribbon, but with less pressure).
peeling the kite away.
DONE!!
What do you think? I love putting little accessories or candies in them.
I would love to get some ideas from you on how else I could use these cranes!
_____________________
I used a pattern found in this book, 「すぐ使える折り紙」by Boutique-sha. (Both links are in Japanese)


No comments:
Post a Comment